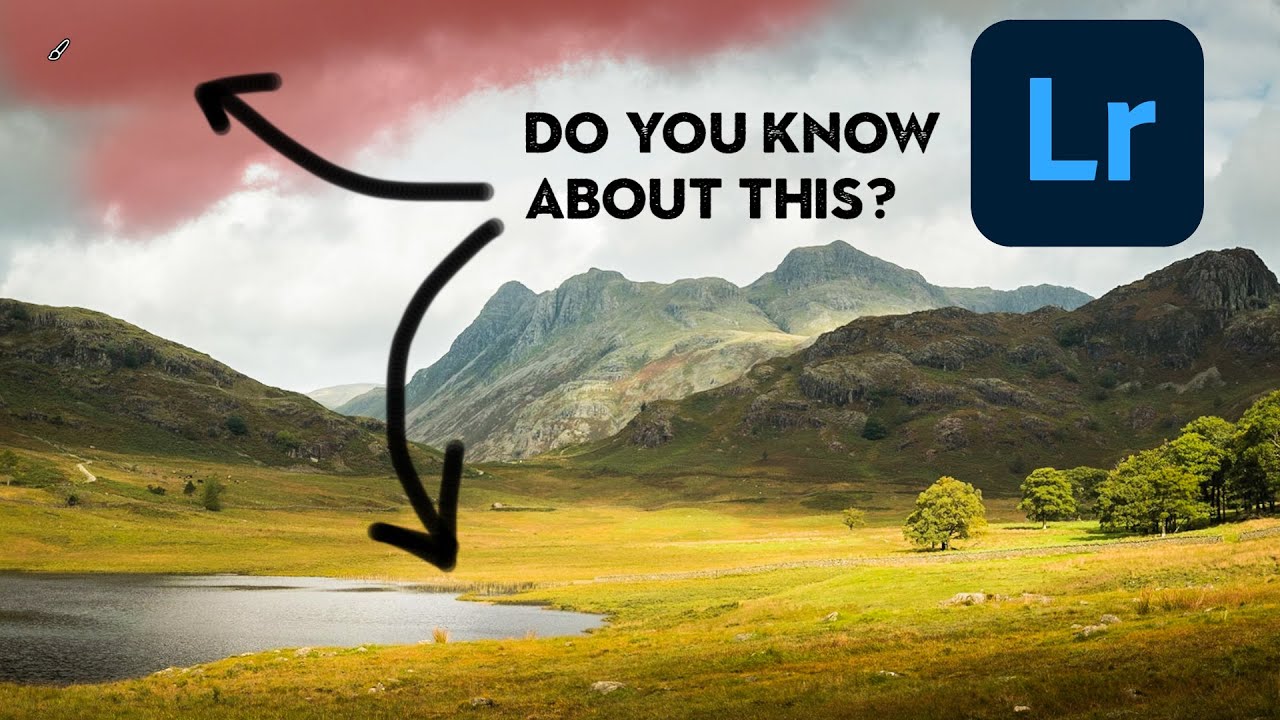
I spent years treating the Lightroom brush tool like a finishing move — something you reached for at the end of an edit when everything else had failed. Broad adjustments first, local adjustments never, maybe a graduated filter if I was feeling ambitious. It wasn’t until I started studying how working landscape photographers actually move through an edit that I realized I had it completely backwards. The brush isn’t a rescue tool. It’s the whole point.
In this Nigel Danson tutorial, Watch the full tutorial on YouTube, Danson walks through a real landscape edit from a raw file all the way to a finished image, and the brush is doing the heavy lifting the entire time. What makes it worth your time is that he doesn’t just show you the tool’s settings. He shows you the decision-making behind when to use a brush instead of a gradient, when to subtract from a mask instead of starting over, and why the old darkroom techniques of dodging and burning translate almost perfectly into this workflow. Danson grew up printing in actual darkrooms with Ansel Adams as his reference point. That context matters, because it means every move he makes has a reason behind it.
Step 1: Start with a Crop That Commits You to a Composition
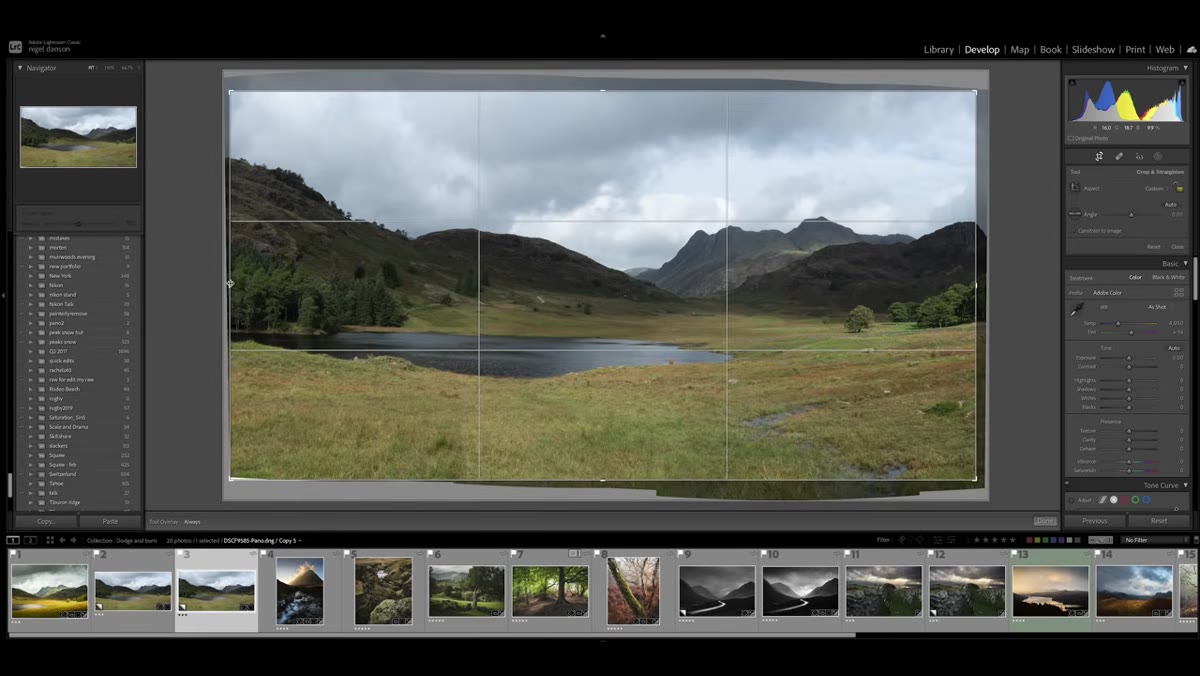 Crop panel open, left side of panorama being trimmed
Before any tonal work happens, Danson crops the panoramic image to remove a left-side section that wasn’t working compositionally. This isn’t a throwaway step. Cropping first forces you to commit to what the image is actually about before you start making adjustments that might not serve the final frame. He keeps a lake reflection and a mountain balanced on either side of the frame, and that structural decision drives every masking choice that follows. Crop late and you risk spending twenty minutes perfecting a section of sky you’re about to cut off.
Crop panel open, left side of panorama being trimmed
Before any tonal work happens, Danson crops the panoramic image to remove a left-side section that wasn’t working compositionally. This isn’t a throwaway step. Cropping first forces you to commit to what the image is actually about before you start making adjustments that might not serve the final frame. He keeps a lake reflection and a mountain balanced on either side of the frame, and that structural decision drives every masking choice that follows. Crop late and you risk spending twenty minutes perfecting a section of sky you’re about to cut off.
Step 2: Lay Down Your Global Edit Before Touching Masks
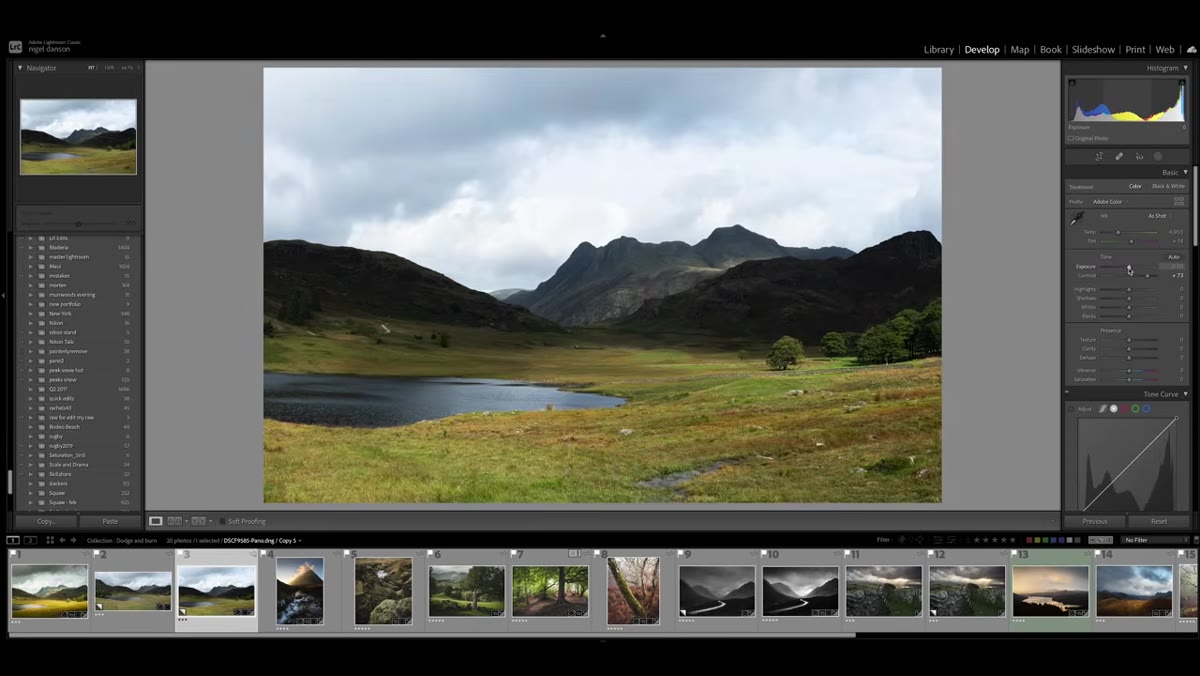 Basic panel with contrast, highlights, shadows being adjusted
Danson runs through a foundational pass in the Basic panel before any local adjustments: contrast up, exposure up, highlights pulled down, shadows lifted, blacks brought in, then a touch of clarity and vibrance. These aren’t dramatic sliders. The goal is to get the raw file to a workable baseline that shows you what the image actually contains. On a raw file with no processing applied, the light and shadow relationships you’re about to paint are invisible. You need the global edit to reveal the problems the local tools will solve.
Basic panel with contrast, highlights, shadows being adjusted
Danson runs through a foundational pass in the Basic panel before any local adjustments: contrast up, exposure up, highlights pulled down, shadows lifted, blacks brought in, then a touch of clarity and vibrance. These aren’t dramatic sliders. The goal is to get the raw file to a workable baseline that shows you what the image actually contains. On a raw file with no processing applied, the light and shadow relationships you’re about to paint are invisible. You need the global edit to reveal the problems the local tools will solve.
Step 3: Use a Linear Gradient to Handle Large Tonal Zones
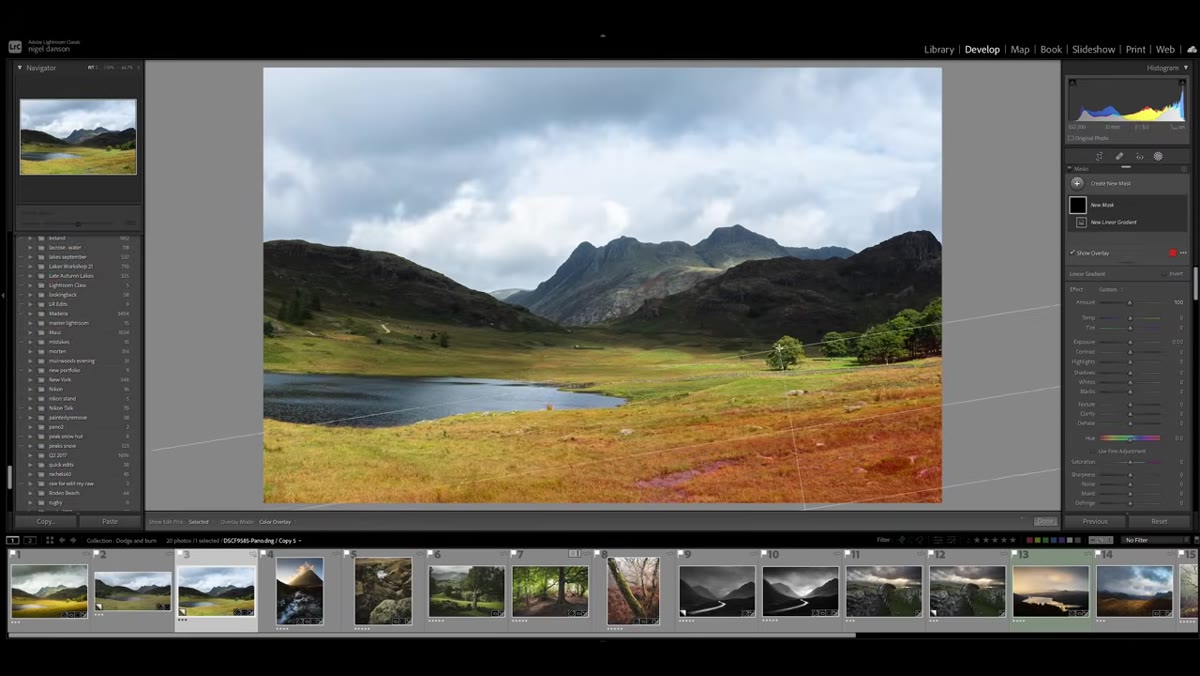 Linear gradient being dragged across bright bottom corner
The bottom corner of Danson’s image is blowing out because the sun was crossing the frame from that direction when he shot it. His first instinct is a linear gradient, which is the right call for a large, even area. He pulls the exposure down, drops the shadows, and trims the whites to simulate the look of natural shadow falling across that zone. The key word he uses is “subtle.” This is not a dramatic darkening. You want the viewer’s eye to move naturally, not notice a filter was applied. If you can see the gradient’s edge, it’s too strong.
Linear gradient being dragged across bright bottom corner
The bottom corner of Danson’s image is blowing out because the sun was crossing the frame from that direction when he shot it. His first instinct is a linear gradient, which is the right call for a large, even area. He pulls the exposure down, drops the shadows, and trims the whites to simulate the look of natural shadow falling across that zone. The key word he uses is “subtle.” This is not a dramatic darkening. You want the viewer’s eye to move naturally, not notice a filter was applied. If you can see the gradient’s edge, it’s too strong.
Step 4: Switch to the Brush for Edges That Gradients Can’t Handle
 Brush tool selected, painting adjustment onto sky area
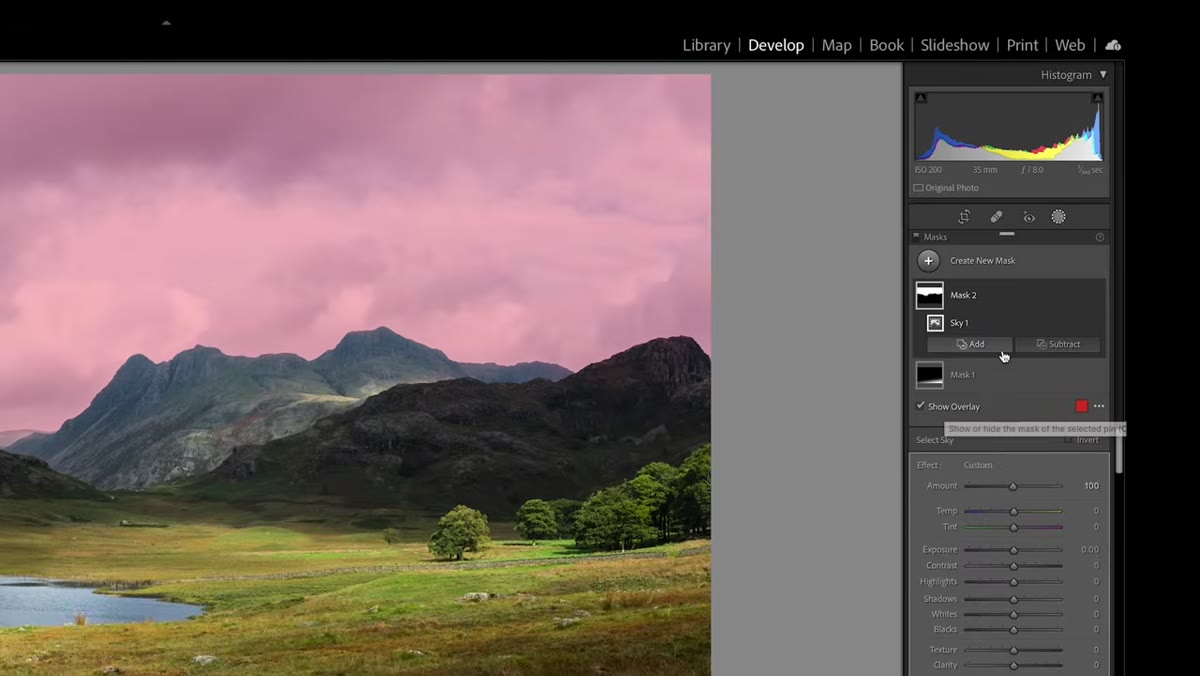
Here’s where the tutorial shifts into the technique most photographers skip. Danson decides to handle the sky with a brush instead of a second gradient because the mountain’s irregular edge makes a straight-line mask useless. He sets the sky adjustment first, warming the tone slightly, darkening the exposure, and bringing the highlights down while lifting shadows a touch. Then he paints that adjustment across the sky with a large, soft brush. The result is a sky that feels lit differently from the foreground without any geometric edge giving the game away.
Brush tool selected, painting adjustment onto sky area
Here’s where the tutorial shifts into the technique most photographers skip. Danson decides to handle the sky with a brush instead of a second gradient because the mountain’s irregular edge makes a straight-line mask useless. He sets the sky adjustment first, warming the tone slightly, darkening the exposure, and bringing the highlights down while lifting shadows a touch. Then he paints that adjustment across the sky with a large, soft brush. The result is a sky that feels lit differently from the foreground without any geometric edge giving the game away.
Step 5: Subtract from Your Mask to Fix Halos Around Mountain Edges
 Brush in subtract mode erasing effect near mountain ridge
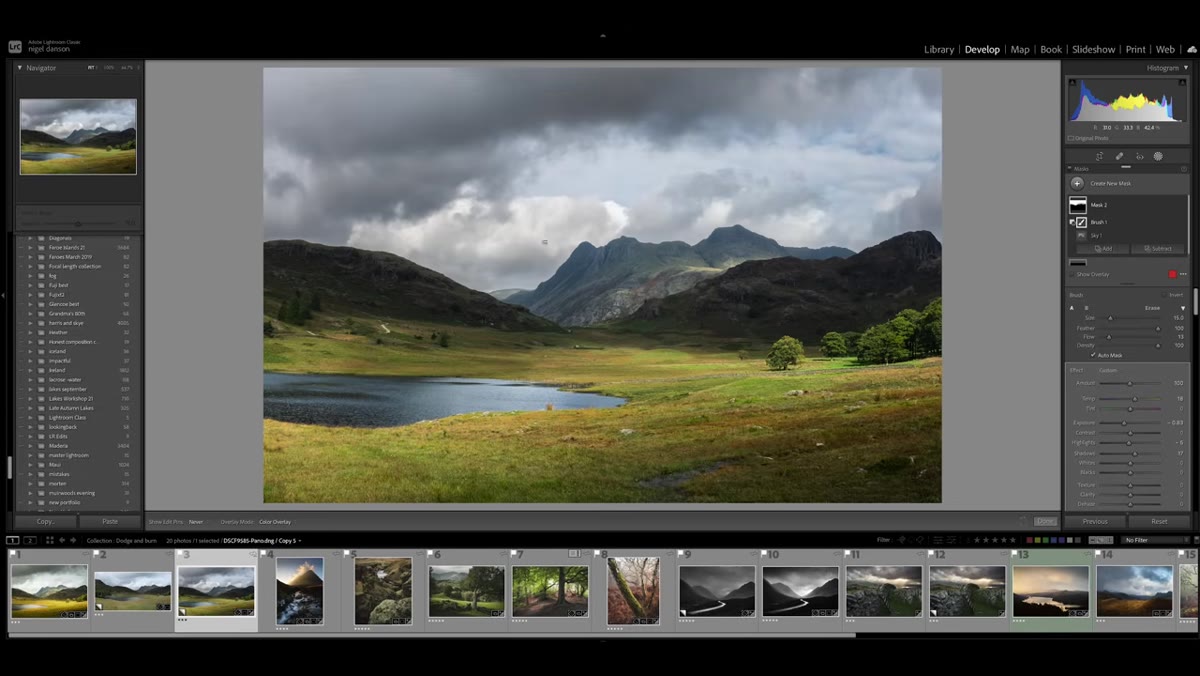
This is the move that separates a clean mask from one that looks like a phone app filter. After painting the sky adjustment, Danson notices a halo forming along the top edge of the mountain where the sky effect is bleeding into the rock. Instead of starting the mask over, he switches the brush to Subtract mode and paints back along that edge with a large feathered brush. The sky effect lifts off just the areas he touches, and the mountain ridge reads cleanly again. Subtract mode is non-destructive, fast, and precise enough for organic shapes like treelines and ridges.
Brush in subtract mode erasing effect near mountain ridge
This is the move that separates a clean mask from one that looks like a phone app filter. After painting the sky adjustment, Danson notices a halo forming along the top edge of the mountain where the sky effect is bleeding into the rock. Instead of starting the mask over, he switches the brush to Subtract mode and paints back along that edge with a large feathered brush. The sky effect lifts off just the areas he touches, and the mountain ridge reads cleanly again. Subtract mode is non-destructive, fast, and precise enough for organic shapes like treelines and ridges.
Step 6: Dial In Brush Settings for Precision and Control
 Brush settings panel showing size, feather, and flow sliders
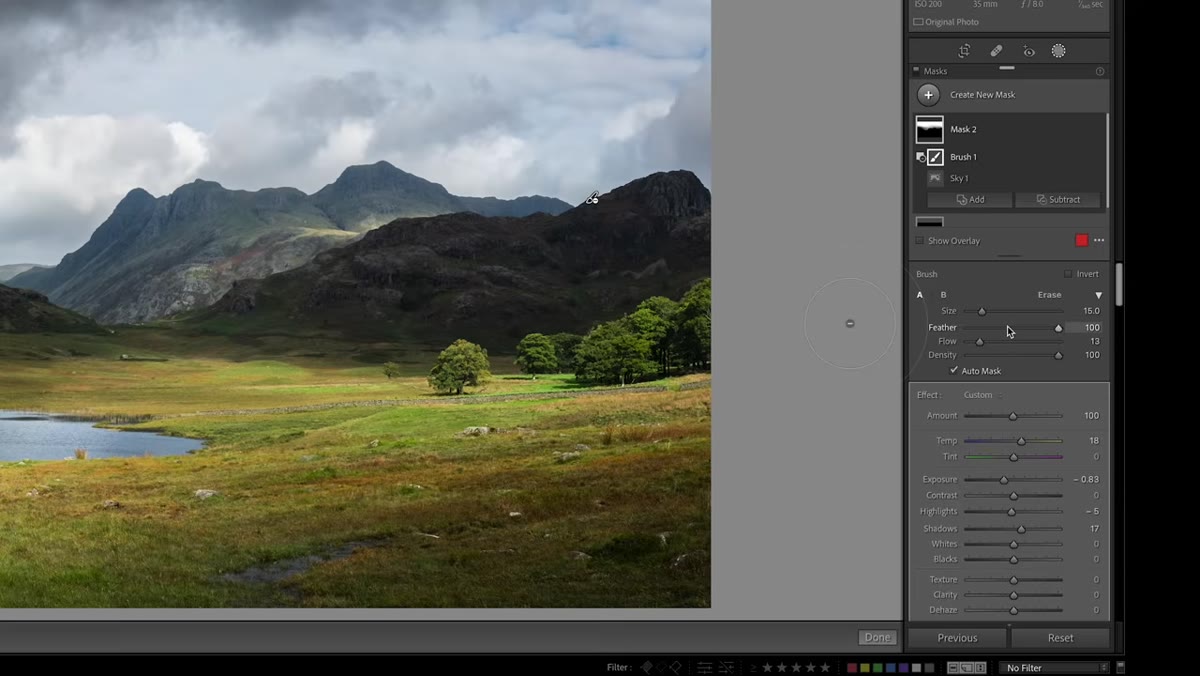
Danson pauses to walk through the brush panel controls because most people either ignore them or leave them at defaults. Size controls how wide the brush stroke is and can be adjusted with your scroll wheel in real time while you paint. Feather controls how hard the edge of the brush is. A high feather value blends your adjustment gradually into the surrounding areas so the transition is invisible. Flow is the one that gets overlooked most often. Low flow means the adjustment builds up slowly with repeated strokes, which gives you much more control on delicate areas like mountain edges or where sky meets water.
Brush settings panel showing size, feather, and flow sliders
Danson pauses to walk through the brush panel controls because most people either ignore them or leave them at defaults. Size controls how wide the brush stroke is and can be adjusted with your scroll wheel in real time while you paint. Feather controls how hard the edge of the brush is. A high feather value blends your adjustment gradually into the surrounding areas so the transition is invisible. Flow is the one that gets overlooked most often. Low flow means the adjustment builds up slowly with repeated strokes, which gives you much more control on delicate areas like mountain edges or where sky meets water.
One Thing I’d Add from My Own Workflow
Danson works entirely with a mouse in this tutorial, but he does mention the iPad and Apple Pencil briefly as a game changer for brush work. I’d push that point harder. Once I started using a tablet for Lightroom masking, my halos dropped off dramatically and my editing sessions got shorter. Pressure sensitivity alone makes the flow control feel natural in a way that clicking and dragging never quite does. If you’re doing any serious local adjustments, a basic drawing tablet is one of the highest-return investments you can make. Even a budget Wacom entry-level model will change how you think about the brush.
The biggest thing I took from rewatching this tutorial is simple: the brush tool is not a corrective tool. It’s a compositional one. Danson isn’t fixing mistakes. He’s redirecting the viewer’s eye, creating depth, and simulating the quality of light he actually wanted when he was standing at that lake. That’s what dodge and burn always was in the darkroom, and it’s still exactly what it is in Lightroom today. The medium changed. The intention didn’t.
Watch the full tutorial on YouTube to see Danson’s complete edit in real time, including how he handles the full mountain and sky in the second half of the session.
Comments (2)
Been doing this wrong for years apparently. Thanks for the wake-up call.
I keep coming back to this article. It's that useful.
Leave a Comment