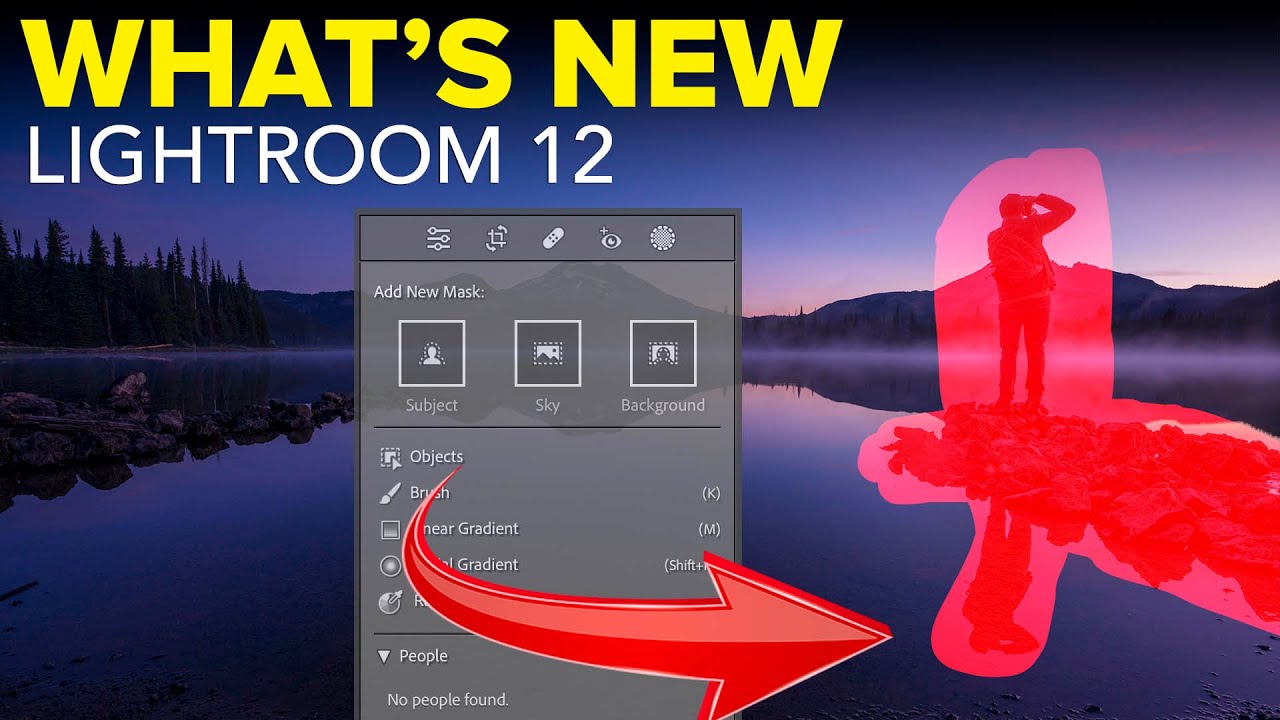
Portrait editing used to be the part of my workflow I’d put on in the background while I went to make coffee. Click a few sliders, dodge some shadows under the eyes, call it done. But client expectations have shifted, and lately I’ve been getting asked to deliver retouching that would have taken me into Photoshop two years ago. So when Adobe dropped the October 2022 update to Lightroom Classic, I needed to know exactly what was new and whether any of it would actually save me time on a real session. That’s when I found this breakdown from Matt Kloskowski. Watch the full tutorial on YouTube
What Matt covers in this tutorial isn’t just a surface-level feature tour. The portrait masking additions alone represent a fundamental change in how Lightroom handles faces, skin, and individual facial features. If you shoot people, headshots, weddings, or really anything where a human being is in the frame, these tools are going to change your editing sessions. Here’s exactly how to use them.
Step 1: Open the Masking Panel in the Develop Module
 Masking panel open in the Develop module
Start in the Develop module and open your Masking panel. Matt points out that the core panel layout hasn’t changed dramatically. What you’ll notice immediately is a new toggle on the left side of the interface that lets you flip between your editing panels and your masking tools without losing your place. It’s a small quality-of-life fix, but after a long session it genuinely reduces the number of clicks you’re making.
Masking panel open in the Develop module
Start in the Develop module and open your Masking panel. Matt points out that the core panel layout hasn’t changed dramatically. What you’ll notice immediately is a new toggle on the left side of the interface that lets you flip between your editing panels and your masking tools without losing your place. It’s a small quality-of-life fix, but after a long session it genuinely reduces the number of clicks you’re making.
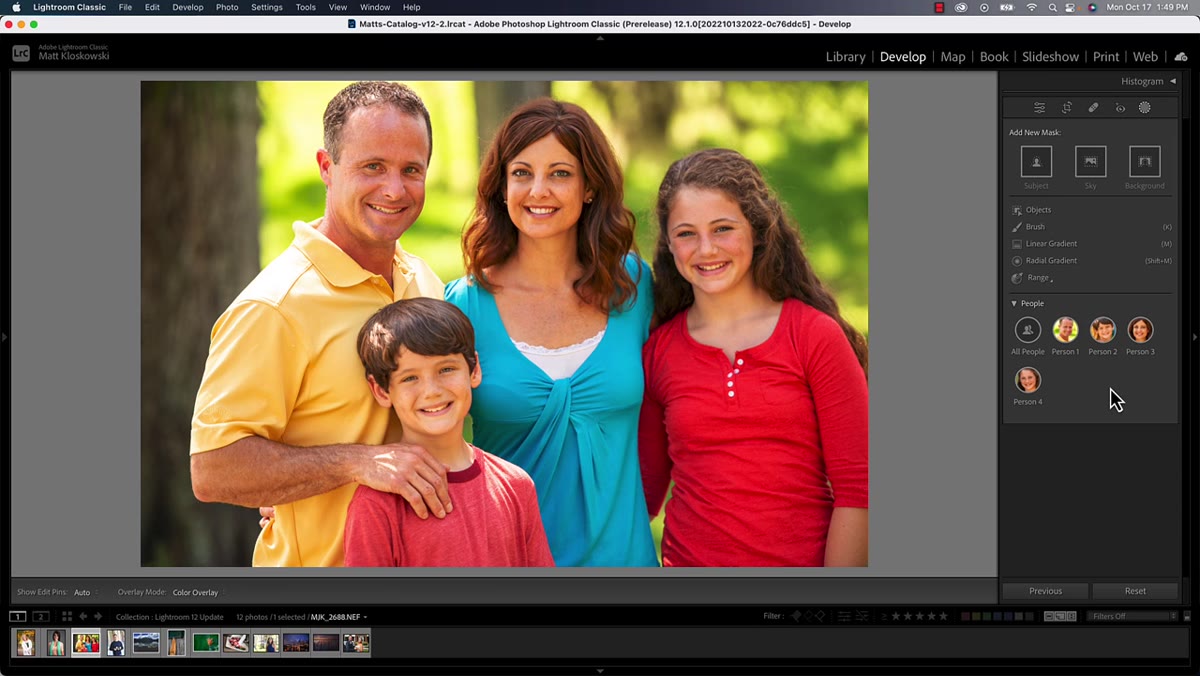
The panel itself now has two new icons at the top, and a dedicated “People” section sitting at the bottom of the masking options. If there are faces in your photo, Lightroom will detect them automatically.
Step 2: Use “Select Background” for Fast Subject Separation
 Select Background option highlighted in masking panel
Near the top of the masking panel you’ll find the new “Select Background” option. This is AI-powered and works exactly the way it sounds. Lightroom analyzes the image and generates a mask covering everything that isn’t your subject. For portrait work, this means you can darken, desaturate, or blur the background non-destructively without touching a single brush stroke.
Select Background option highlighted in masking panel
Near the top of the masking panel you’ll find the new “Select Background” option. This is AI-powered and works exactly the way it sounds. Lightroom analyzes the image and generates a mask covering everything that isn’t your subject. For portrait work, this means you can darken, desaturate, or blur the background non-destructively without touching a single brush stroke.
Before this, I was either using “Select Subject” and inverting the mask, or doing a lot of manual brush work around hair and shoulders. Select Background handles those tricky edges much more cleanly, especially on images where the subject’s hair blends into a similar-toned background.
Step 3: Try the New AI-Powered “Select Object” Brush
 AI brush being scribbled over an object in the photo
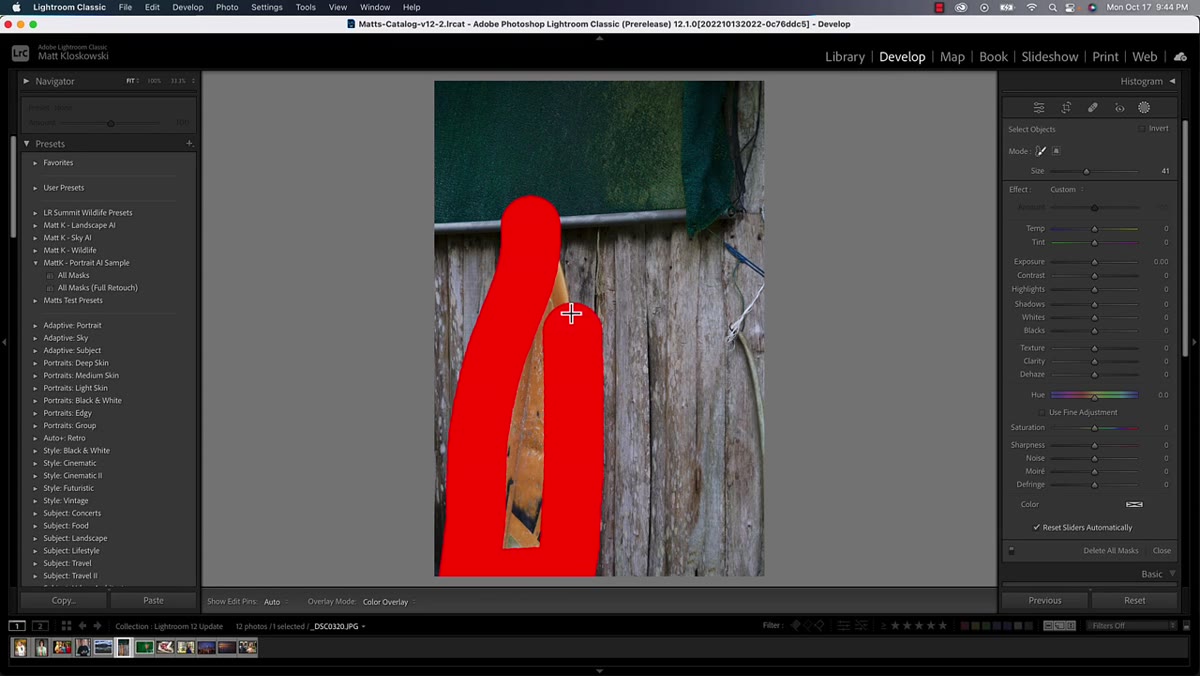
The other major addition to the top of the panel is “Select Object.” This one is genuinely fun to use. Instead of carefully painting a precise selection, you just scribble loosely over whatever you want to select, and Lightroom’s AI builds a clean mask around that object automatically. Think of it like telling Lightroom “this thing, right here” and letting it figure out the edges.
AI brush being scribbled over an object in the photo
The other major addition to the top of the panel is “Select Object.” This one is genuinely fun to use. Instead of carefully painting a precise selection, you just scribble loosely over whatever you want to select, and Lightroom’s AI builds a clean mask around that object automatically. Think of it like telling Lightroom “this thing, right here” and letting it figure out the edges.
For portraits, this is especially useful for selecting clothing, accessories, or background props you want to adjust independently. The selection quality is surprisingly good on clean edges. On very complex backgrounds it needs a little help, but for 80 percent of portrait scenarios it nails it on the first try.
Step 4: Select a Person and Explore Facial Feature Masks
 People section expanded showing face, body, eyes, teeth options
Scroll down to the People section at the bottom of the masking panel. If Lightroom detected a face in your image, it will appear here as a thumbnail. Click on it, and this is where things get interesting. You’ll see a full list of selectable regions: the face, the body, the eyebrows, the whites of the eyes, the iris, the lips, the teeth, and the hair.
People section expanded showing face, body, eyes, teeth options
Scroll down to the People section at the bottom of the masking panel. If Lightroom detected a face in your image, it will appear here as a thumbnail. Click on it, and this is where things get interesting. You’ll see a full list of selectable regions: the face, the body, the eyebrows, the whites of the eyes, the iris, the lips, the teeth, and the hair.
Each of these is a separate, AI-generated mask. You can select multiple at once, and Lightroom will ask if you want to create them as individual masks or combine them into one. Matt strongly suggests separate masks, and I agree completely. Keeping them separate means you can target teeth brightness without accidentally affecting lip color, or adjust iris contrast without touching the whites of the eyes.
Step 5: Apply Targeted Adjustments to Each Facial Mask
 Individual facial masks in the panel with adjustments applied
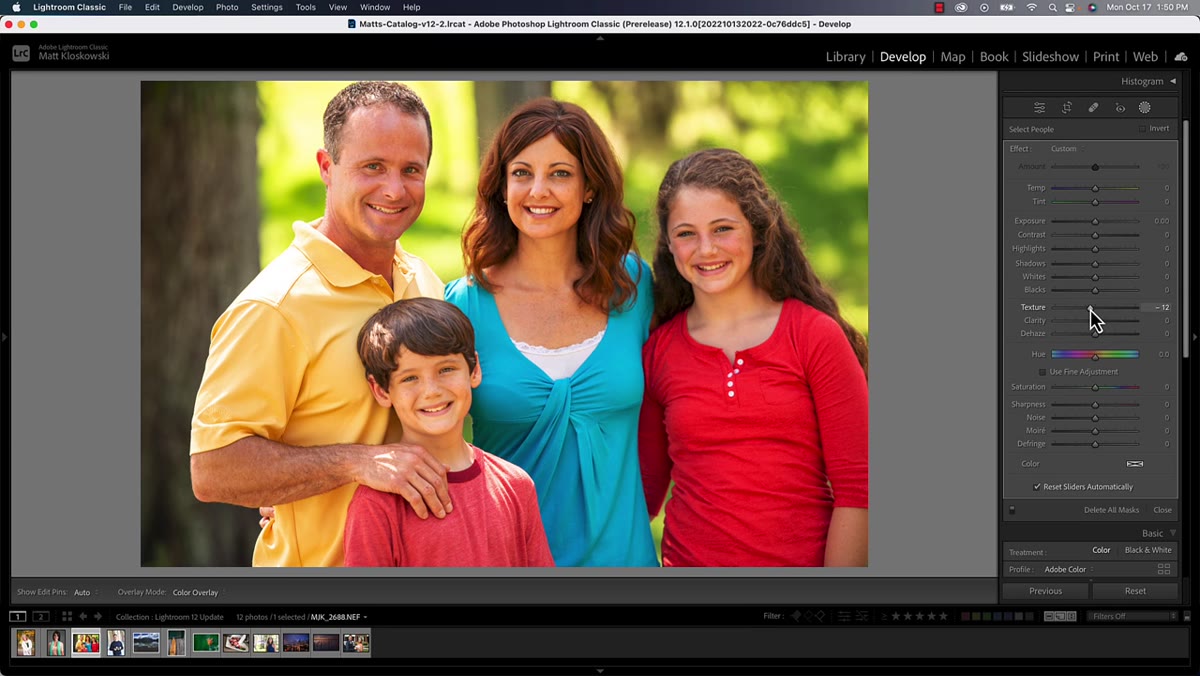
Once your masks are created, everything works exactly the same as any other Lightroom mask. Click into a mask, and your full adjustment panel is available on the right. The difference is the precision of what you’re adjusting.
Individual facial masks in the panel with adjustments applied
Once your masks are created, everything works exactly the same as any other Lightroom mask. Click into a mask, and your full adjustment panel is available on the right. The difference is the precision of what you’re adjusting.
Matt walks through a solid starting-point workflow here. For skin, reducing Texture and Clarity softens the complexion without the plastic look you get from global adjustments. For the whites of the eyes, a small Exposure bump, maybe plus 0.15 to 0.25, adds life without making the eyes look artificially lit. For the iris, pushing Shadows and Highlights in opposite directions adds depth and makes the eyes pop. For teeth, a slight Exposure increase combined with a small drop in Saturation removes yellowing without making the teeth look bleached.
Step 6: Add Masks for Additional People in the Frame
 Create Mask button used to add a second person’s selections
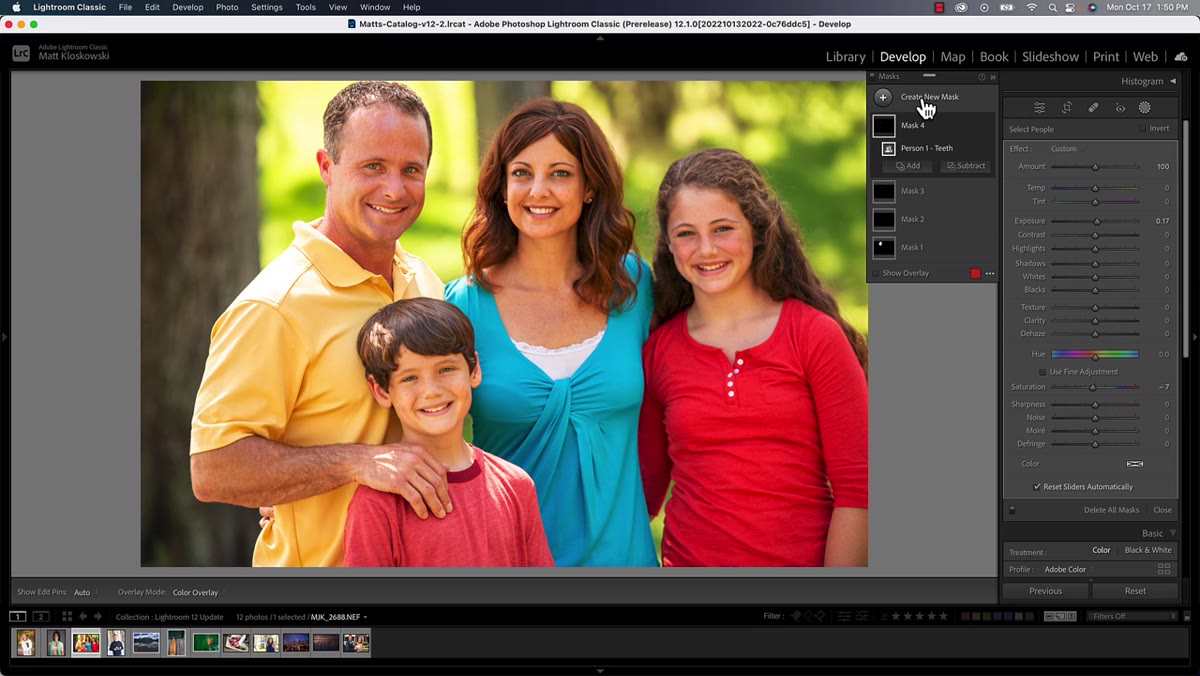
If your photo has more than one person in it, the workflow doesn’t start over. After finishing your adjustments on the first subject, click “Create Mask” in the panel, then scroll back down to the People section and select the second person. You’ll go through the same facial feature selection process for them independently.
Create Mask button used to add a second person’s selections
If your photo has more than one person in it, the workflow doesn’t start over. After finishing your adjustments on the first subject, click “Create Mask” in the panel, then scroll back down to the People section and select the second person. You’ll go through the same facial feature selection process for them independently.
This is the right way to handle group portraits, since each person’s face needs different amounts of correction. One subject might need more teeth whitening, another might have eyes that need less exposure compensation. Working person by person keeps everything clean and fully adjustable without any masks interfering with each other.
My Take: These Masks Need Good Starting Exposures to Shine
The one thing I’d add from my own experience is that these AI portrait masks perform noticeably better when your base exposure is already in a reasonable range. If the image is significantly underexposed or heavily backlit, the edge detection on hair and skin boundaries gets shakier. My habit now is to do a quick global tone correction first, get the overall image in the ballpark, and then go into portrait masking mode. Treating these masks like a finishing layer rather than a rescue tool gets you cleaner selections and saves time on manual cleanup.
Matt mentions in the tutorial that he built two presets specifically designed to work alongside these new portrait tools, and they’re available in the video description. I grabbed them immediately. They’re built around this exact workflow and they’re the kind of thing I would have spent a weekend building myself and then given away anyway.
The single biggest takeaway here is this: Lightroom just closed a huge gap between what you could accomplish in Lightroom versus jumping into Photoshop for portrait work. The facial feature masks are precise enough to replace most of the targeted adjustment brush work that used to eat up serious editing time, and the AI selections are reliable enough to trust on client deliverables. This update deserves more attention than it got.
Watch the full tutorial on YouTube to see Matt walk through the full portrait masking deep dive and grab those presets while you’re there.
Comments (1)
I've been looking for exactly this kind of tutorial. Perfect timing.
Leave a Comment