Every photographer I know has a catalog graveyard somewhere. You import a shoot, you edit a few selects, life happens, and six months later you’re scrolling through a grid of thumbnails with zero memory of which wedding those are or whether you already delivered them. I’ve been there. I had a stretch early in my career where my Lightroom catalog was basically a haunted house. Photos everywhere, no logic, nothing grouped the way it should be. It took me an embarrassing amount of time to fix it, and I wish someone had just shown me the system earlier.
That’s exactly what Scott Kelby and RC Concepcion do in this episode of The Lightroom Show, produced by KelbyOne. Two workflows, back to back: a quick one for installing presets you’ve downloaded, and a deeper one for building a collection structure that actually scales. Neither of these is flashy. But both of them are the kind of thing that separates people who fight their software from people who cruise through it. Watch the full tutorial on YouTube if you want to follow along, or use this breakdown to work through it step by step.
Step 1: Navigate to the Develop Module and Open the Presets Panel
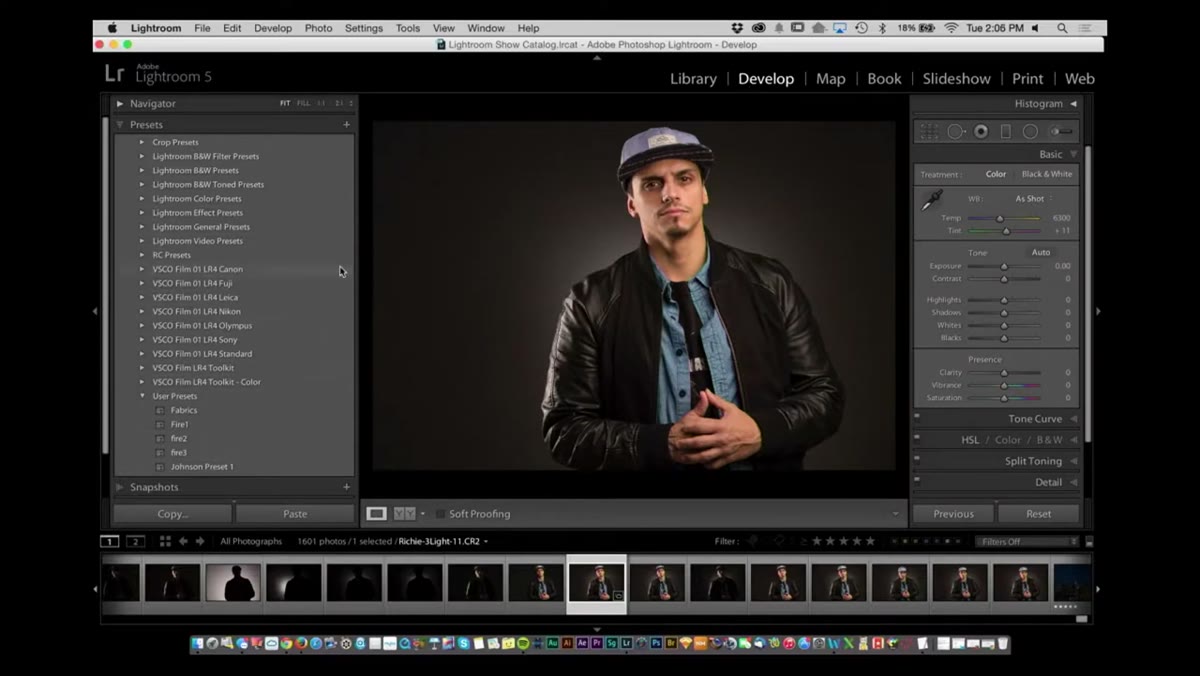 Develop module open with User Presets panel visible on left
Before you can install anything, you need to be in the right place. Open Lightroom, select any image, and switch to the Develop module. On the left side of the screen you’ll see a panel called “User Presets.” This is where all your custom and downloaded presets live. If you’ve never added any, it’ll probably be empty, which is fine.
The panel might be collapsed. Click on it to expand it and make sure you can see the full left-side panel before moving forward. Everything in this first workflow happens right here.
Step 2: Right-Click the User Presets Panel to Import a Preset File
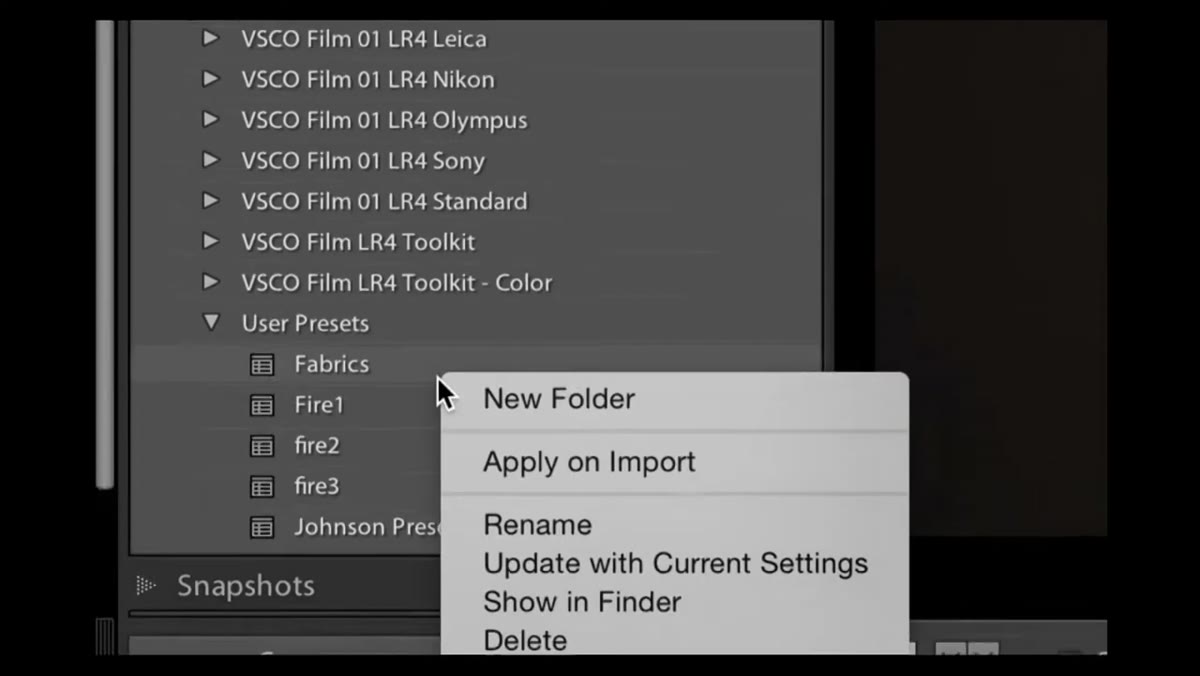 Right-click context menu showing Import option in User Presets panel
Here’s the part that trips people up, because there’s no obvious button for importing a preset. You don’t go to File, you don’t drag and drop. You right-click directly on the “User Presets” section header. A context menu appears, and near the bottom you’ll see an option that says “Import.” Click it.
A file browser opens, and you navigate to wherever you saved the preset file. Lightroom preset files use the .lrtemplate or .xmp format depending on your version. Select the file and confirm. That’s genuinely all there is to it. Lightroom installs the preset and applies it to your current image at the same time, so you get an instant preview. RC named his example preset “Selenium Two,” which is very much my kind of naming convention. Mine are all named after songs.
Step 3: Confirm the Preset Appears in the User Presets Section
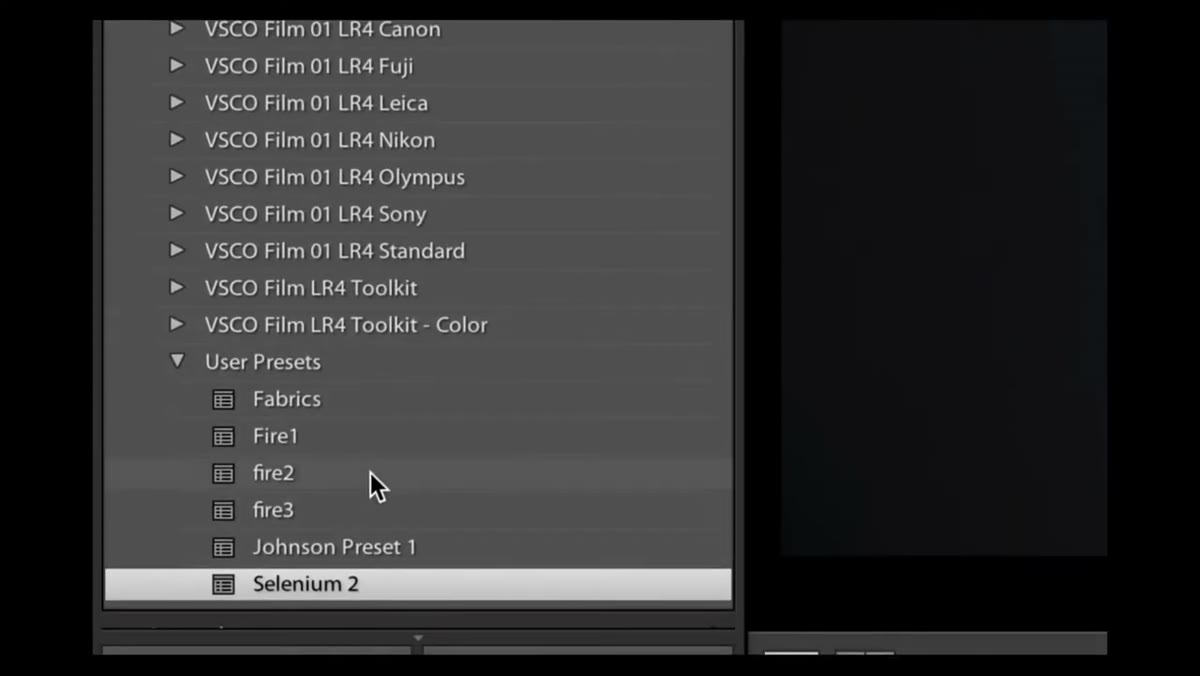 Newly imported preset visible inside User Presets section
After importing, the preset shows up in your User Presets panel and stays there permanently until you delete it. Scroll through the panel to confirm it landed correctly. If you imported it and can’t find it, check whether Lightroom created a subfolder inside User Presets.
This is also a good moment to rename the preset if the downloaded filename is something generic or hard to remember. Right-click the preset name and choose “Rename.” Give it something you’ll actually recognize six months from now.
Step 4: Create a Top-Level Collection Set for the Project
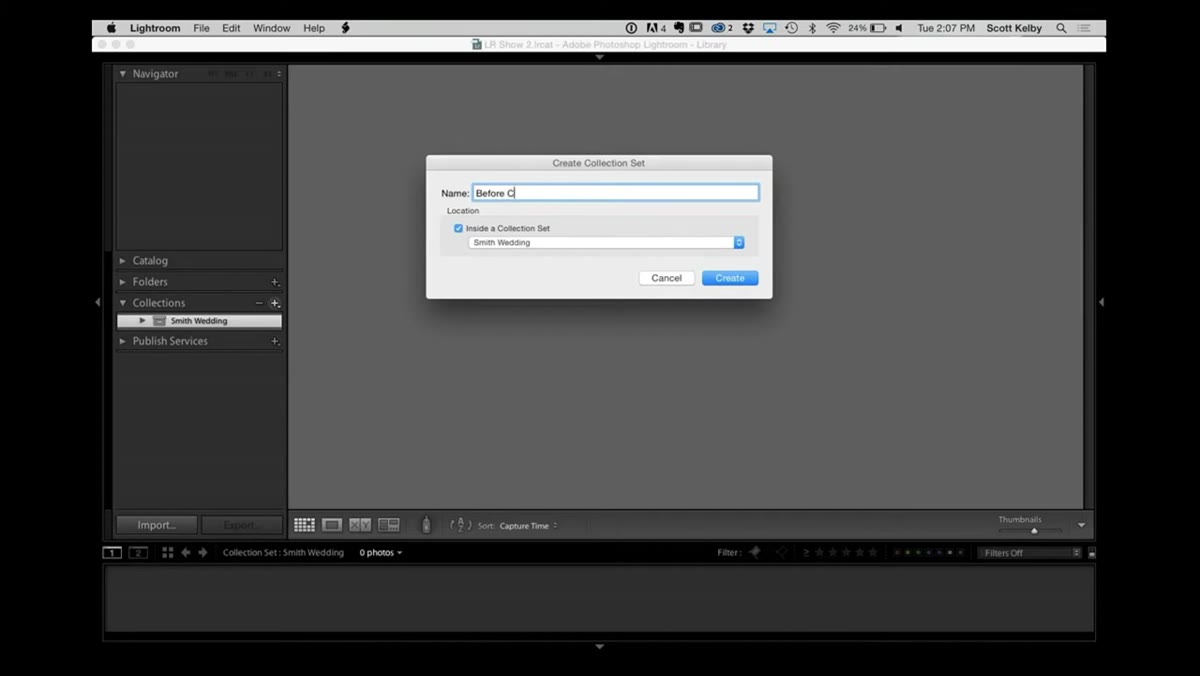
 Collections panel with new collection set being named
Now we move into RC’s organization system, and this is where the tutorial earns its keep. The whole structure is built on collection sets, which are essentially folders that live inside your Collections panel. Go to the Collections panel on the left side of the Library module, click the plus icon, and choose “Create Collection Set.”
Name it after the project. In the tutorial, the example is “Smith Wedding.” This top-level set is the container for everything else connected to that shoot. Think of it as the job folder on your desktop. You’re not putting photos directly in here. You’re using it as the parent for every sub-category that follows.
Step 5: Build Nested Collection Sets for Each Phase of the Shoot
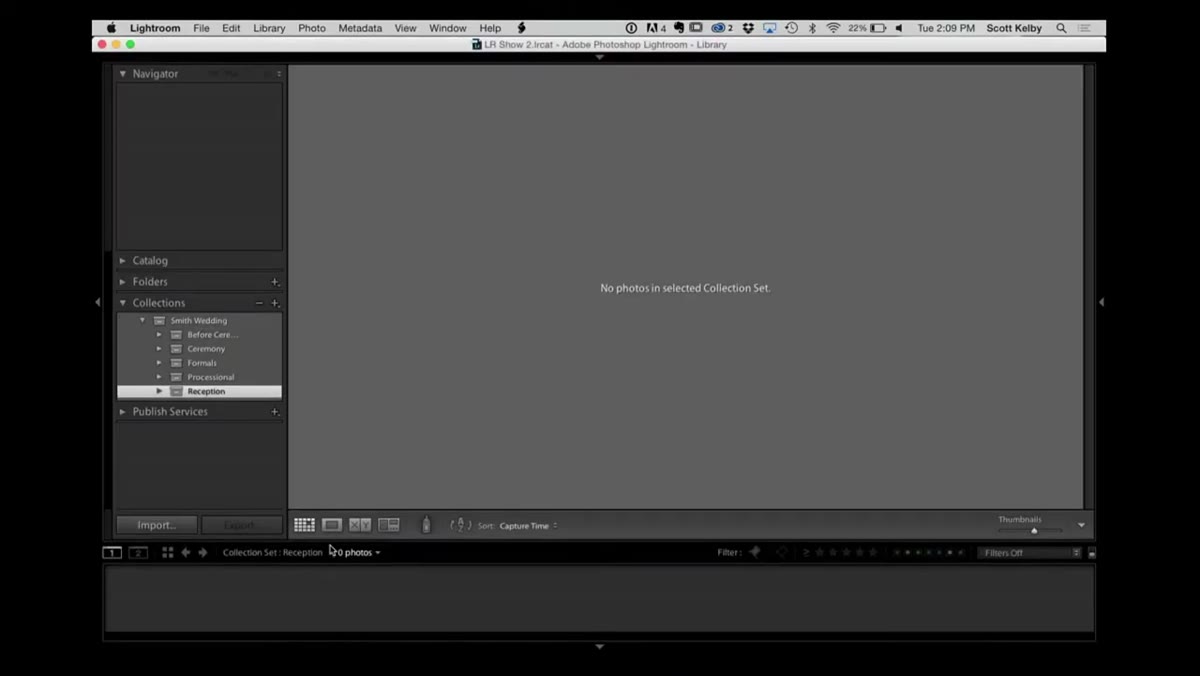
 Nested collection sets inside Smith Wedding parent set
Inside your top-level collection set, you create additional collection sets for each distinct phase or section of the shoot. For a wedding, RC builds out sets like Before Ceremony, Processional, Ceremony, Formals, and Reception. Each one gets created the same way, but during setup you assign it to live inside the parent collection set rather than at the top level.
When you create each new collection set, Lightroom shows you a dropdown to choose the destination. If you only have one top-level set, it defaults there automatically. If you have multiple projects going, pay attention to that dropdown so you don’t accidentally nest things in the wrong place. Five or six sub-sets is roughly where RC caps it, and I think that’s the right instinct. Granularity past a certain point stops helping and starts creating new things to manage.
Step 6: Populate the Collections from Your Import
 Images being selected and added to a specific collection set
Once your structure is built, go to your imported photos and start sorting. Select the images that belong to each phase and drag them into the matching collection set. You can also right-click a selection and choose “Add to Collection” if dragging feels imprecise.
The key behavior to understand here: adding a photo to a collection doesn’t move or duplicate the file. It’s just a reference. The original file stays exactly where it was imported. Collections are organizational pointers, not physical file containers. This matters because you can put the same image in multiple collections without any storage penalty, which is useful when one photo works across categories.
My Caveat: Don’t Build the Structure After the Fact
I’ve made the mistake of importing everything first and then trying to build the collection structure retroactively. It’s miserable. By the time you’re sorting 1,400 wedding photos without any organizational scaffolding, you’re doing the work twice and probably missing things.
The system RC shows here works best when you build the collection sets before you even import the photos. I now do it as part of my pre-import checklist, same as I check my lens profiles and import settings. It takes three minutes to build the skeleton, and those three minutes buy you hours of pain avoidance on the back end. If you shoot events or any multi-phase projects regularly, you can also save a collection set template as a kind of starting point so you’re not rebuilding it from scratch every time.
These two techniques, fast preset installation and a scalable collection structure, aren’t going to change the look of your photos. But they change how much energy you spend getting to your photos and finding them again later. That’s the real workflow tax most people don’t account for. The single most important takeaway here is that collection sets are hierarchical and they’re free to create, so there’s no reason to dump everything into one flat list and hope you remember what’s what.
Watch the full tutorial on YouTube to see Scott and RC walk through both techniques with live demos. It’s one of those episodes where the value is in watching someone actually build the system in real time, not just describe it.
Comments
Leave a Comment