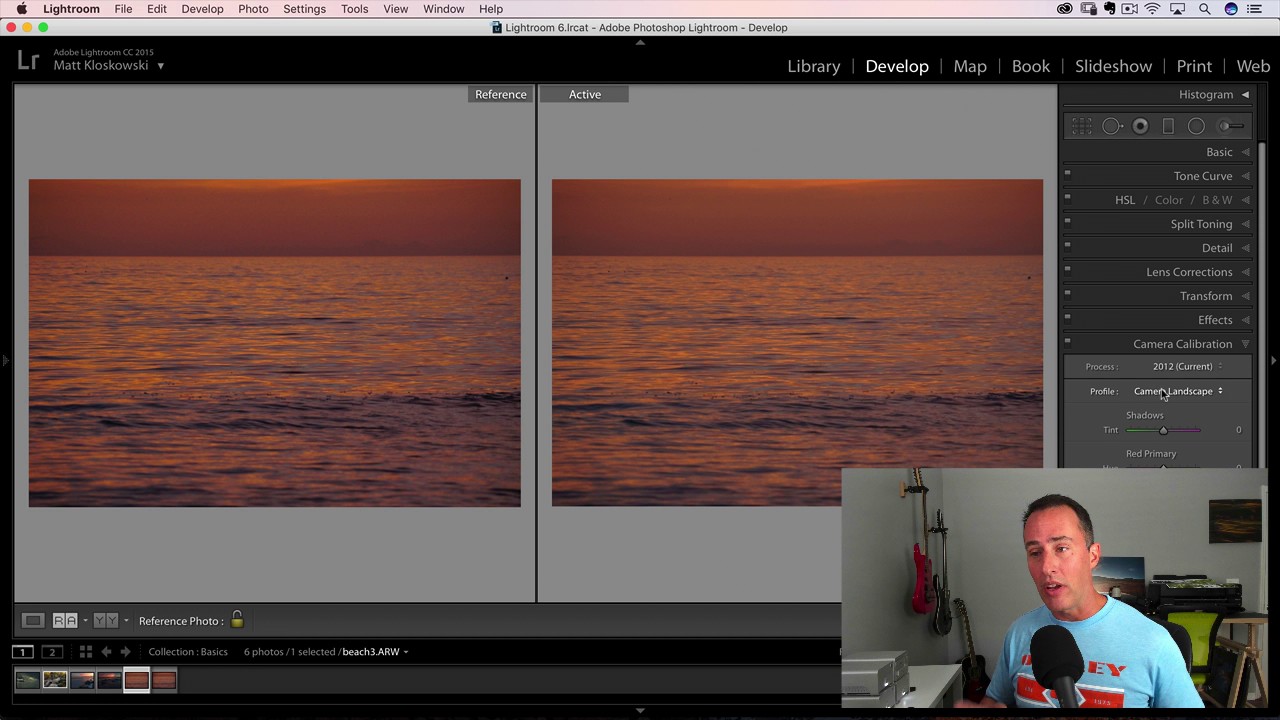
Every photographer I know has had the same deflating moment. You’re on location, chimping your shots on the back of the camera, thinking yes, this is the one — rich shadows, punchy colors, exactly the mood you were going for. Then you import into Lightroom and watch the life drain out of the image in real time. That vivid preview collapses into something flat and gray, and you spend the next twenty minutes chasing a look you already had on a two-inch LCD screen.
This is one of those problems I wasted months trying to solve by stacking adjustments. More contrast, more saturation, drag the clarity slider until the photo looks like it was carved from granite. The results were always a little off, because I was guessing instead of working from the actual target. In this Matt Kloskowski tutorial, he walks through exactly why this happens and shows a method inside Lightroom CC that I genuinely wish I’d known when I was first learning the software. Watch the full tutorial on YouTube
The short version: your camera is showing you a JPEG preview, not the RAW file. Lightroom throws that preview away and shows you the actual data, which hasn’t been processed yet. The fix is to stop guessing what your camera was doing and let Lightroom show you side-by-side so you can dial it in yourself — once, saved as a preset, applied automatically on every future import.
Step 1: Shoot RAW + JPEG at the Same Time
 Camera set to RAW+JPEG mode, two files side by side
Change your camera’s file format setting to RAW + JPEG before your next shoot. Most cameras bury this in the image quality menu. You’re not doing this forever, just for one session to create a reference pair. Shoot something representative of what you normally photograph — portraits, landscapes, street work, whatever your bread and butter is. The goal is to end up with two files of the same frame: the RAW and the JPEG sitting next to each other in your Lightroom catalog.
Camera set to RAW+JPEG mode, two files side by side
Change your camera’s file format setting to RAW + JPEG before your next shoot. Most cameras bury this in the image quality menu. You’re not doing this forever, just for one session to create a reference pair. Shoot something representative of what you normally photograph — portraits, landscapes, street work, whatever your bread and butter is. The goal is to end up with two files of the same frame: the RAW and the JPEG sitting next to each other in your Lightroom catalog.
When you import both into Lightroom, put them side by side in the Grid view. The difference will be obvious. The JPEG will look warmer, more saturated, and more contrasty. That’s your camera’s built-in processing at work, and it’s the look you’re trying to recreate on the RAW side.
Step 2: Open the Develop Module and Enable Reference View
 Reference View activated in Lightroom Develop module toolbar
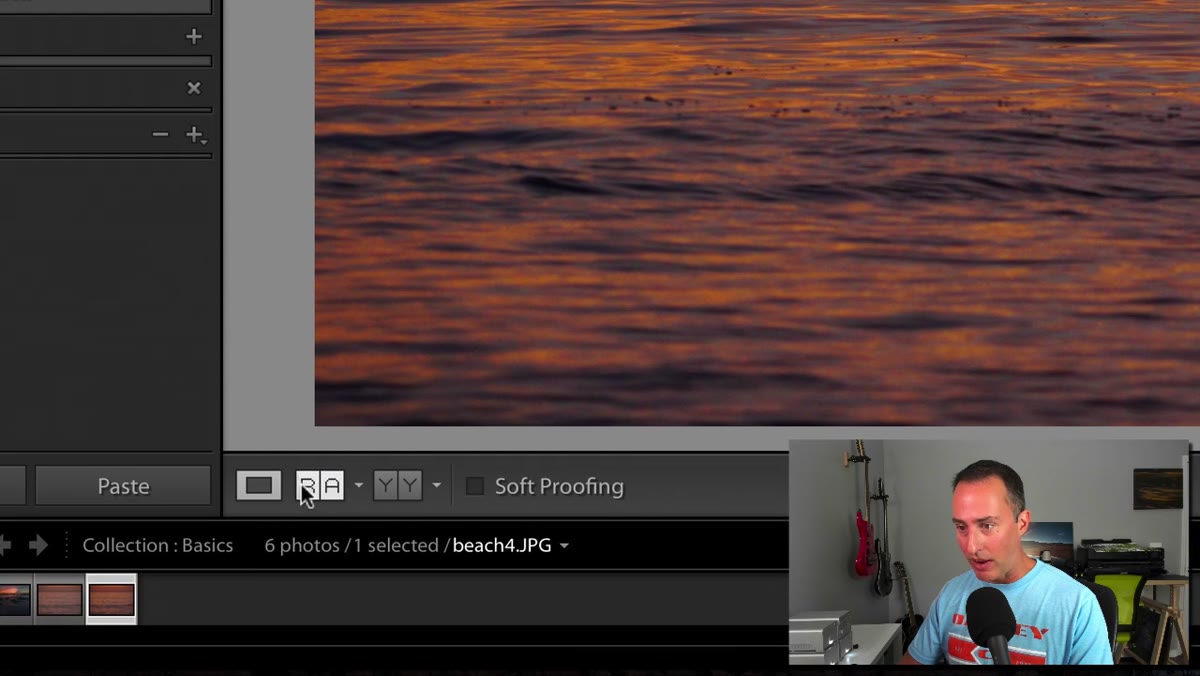
Jump into the Develop module with your RAW file selected. Look at the toolbar running along the bottom of the image area. If it’s not visible, press the letter T to toggle it on. Inside that toolbar you’ll see a small icon for Reference View — it’s a split-screen mode that was added to Lightroom CC and lets you compare two different photos from your filmstrip at the same time, not just before-and-after states of the same file.
Reference View activated in Lightroom Develop module toolbar
Jump into the Develop module with your RAW file selected. Look at the toolbar running along the bottom of the image area. If it’s not visible, press the letter T to toggle it on. Inside that toolbar you’ll see a small icon for Reference View — it’s a split-screen mode that was added to Lightroom CC and lets you compare two different photos from your filmstrip at the same time, not just before-and-after states of the same file.
This distinction matters. Reference View isn’t the same as the standard before-and-after toggle. It pulls in a completely separate image as a locked reference panel, which means you can edit one photo while staring directly at another for comparison. For this exercise, that’s exactly what you need.
Step 3: Drag the JPEG Into the Reference Panel
 JPEG dragged to left reference panel, RAW on right
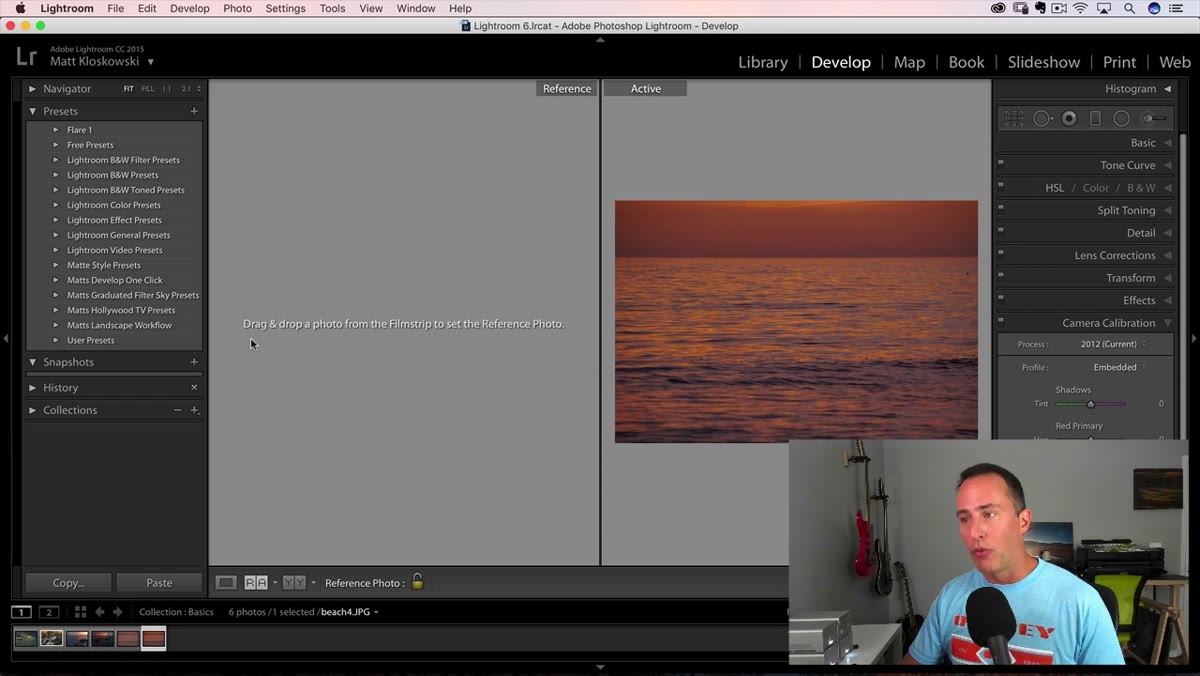
With Reference View active, you’ll see two panels. The left side prompts you to drag a photo from the filmstrip to use as your reference. Drag the JPEG there. The right side is your active editing panel — drag the RAW file there, or simply make sure it’s your selected photo. Now you have the camera-processed JPEG on the left and the flat RAW on the right, both visible at the same time.
JPEG dragged to left reference panel, RAW on right
With Reference View active, you’ll see two panels. The left side prompts you to drag a photo from the filmstrip to use as your reference. Drag the JPEG there. The right side is your active editing panel — drag the RAW file there, or simply make sure it’s your selected photo. Now you have the camera-processed JPEG on the left and the flat RAW on the right, both visible at the same time.
Collapse the left panel strip to give yourself more screen real estate. You want as much of both images visible as possible so you can judge color and contrast accurately without squinting.
Step 4: Scroll Down to Camera Calibration and Try the Profiles
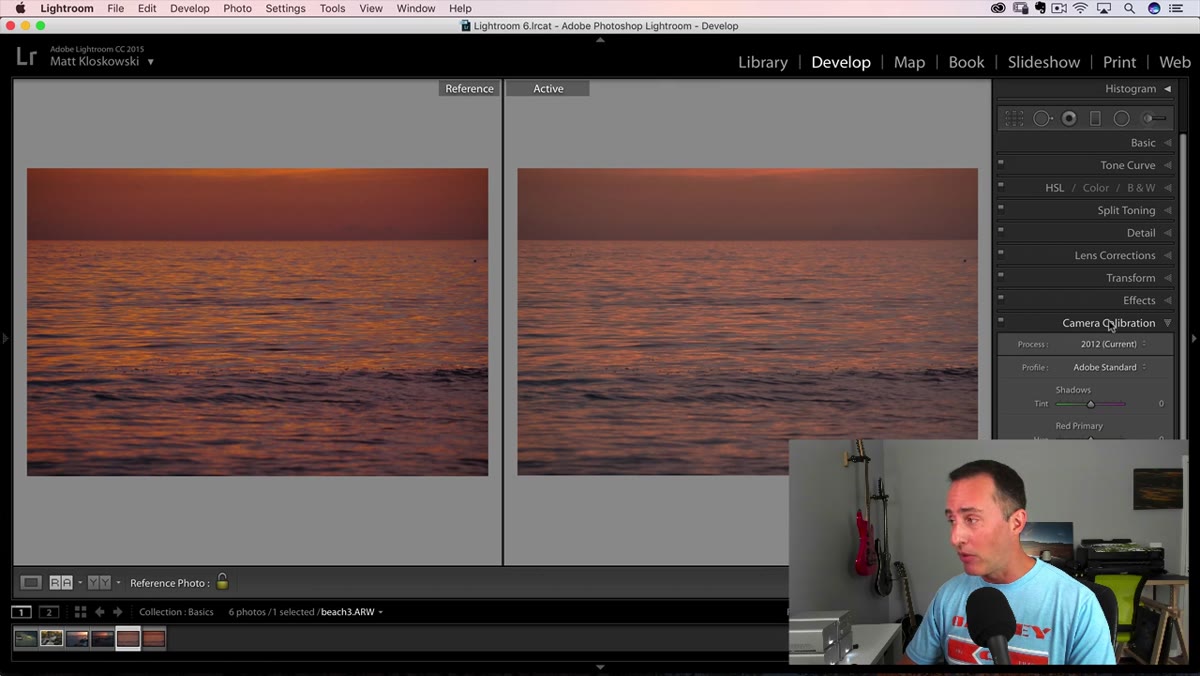 Camera Calibration panel open, Profile dropdown visible
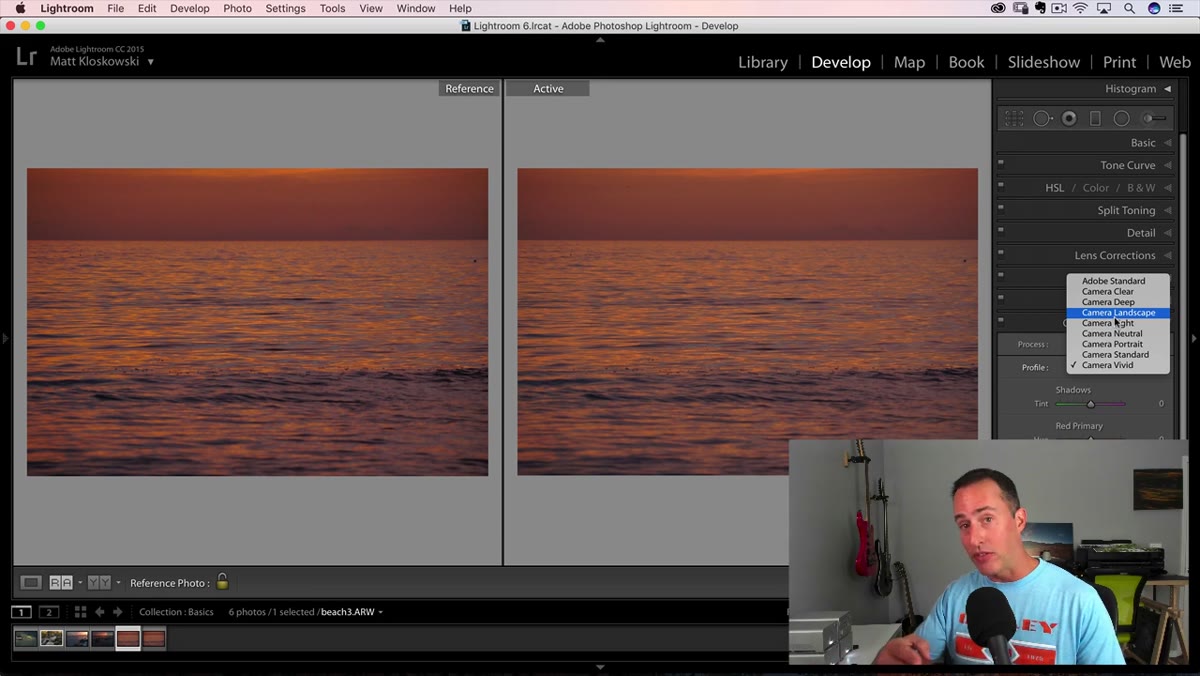
This is the part that changes how you think about RAW processing. In the right-hand panel, scroll all the way to the bottom until you reach the Camera Calibration section. Open it, and look at the Profile dropdown. You’ll see a list of profiles that Adobe has built to simulate your specific camera’s JPEG rendering modes — things like Standard, Vivid, Landscape, Portrait, Neutral, and a few others depending on your camera brand and model.
Camera Calibration panel open, Profile dropdown visible
This is the part that changes how you think about RAW processing. In the right-hand panel, scroll all the way to the bottom until you reach the Camera Calibration section. Open it, and look at the Profile dropdown. You’ll see a list of profiles that Adobe has built to simulate your specific camera’s JPEG rendering modes — things like Standard, Vivid, Landscape, Portrait, Neutral, and a few others depending on your camera brand and model.
Click through them one by one while watching the active panel on the right. Each profile shifts the overall color rendering, contrast, and saturation in ways that no single slider can replicate, because these profiles operate at a deeper level than the tone curve or HSL panel. Your job here is to find the one that brings the RAW photo closest to the JPEG reference on the left. For most cameras, something in the Landscape or Standard range will get you surprisingly close.
Step 5: Fine-Tune With Basic Panel Adjustments
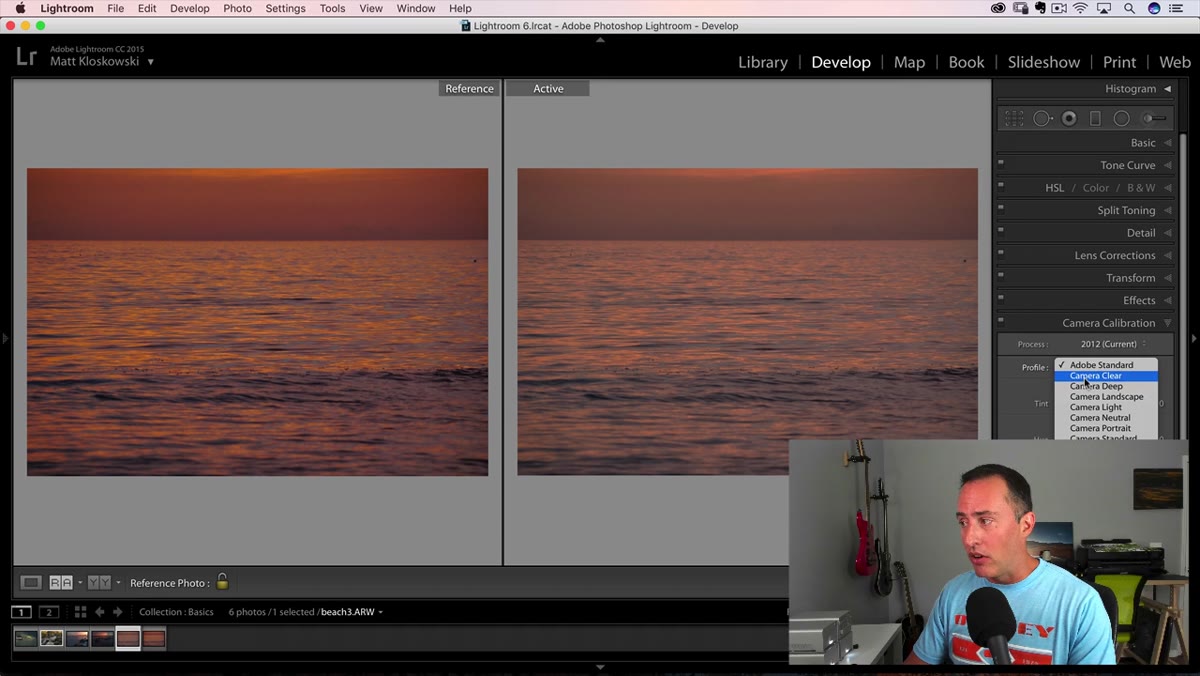 Basic panel sliders adjusted alongside reference view
Once you’ve picked the best profile, you’ll likely still have a small gap between the reference JPEG and your RAW. Close it with targeted adjustments in the Basic panel. A small boost to Contrast, a nudge of Vibrance rather than Saturation (it’s gentler on skin tones), and sometimes a slight lift to Clarity will get you the rest of the way there. Don’t over-correct — the profile does the heavy lifting, and the Basic panel is just closing the last 10 to 15 percent of the gap.
Basic panel sliders adjusted alongside reference view
Once you’ve picked the best profile, you’ll likely still have a small gap between the reference JPEG and your RAW. Close it with targeted adjustments in the Basic panel. A small boost to Contrast, a nudge of Vibrance rather than Saturation (it’s gentler on skin tones), and sometimes a slight lift to Clarity will get you the rest of the way there. Don’t over-correct — the profile does the heavy lifting, and the Basic panel is just closing the last 10 to 15 percent of the gap.
Resist the urge to match the files perfectly at the pixel level. You’re building a starting point, not a clone. The JPEG is reference, not gospel.
Step 6: Save It as a Preset and Apply on Import
 Save Preset dialog in Lightroom Develop module
Once the RAW looks close to the JPEG and you’re happy with the combination of profile and basic adjustments, save it as a Develop preset. Click the + icon in the Presets panel, name it something you’ll remember (I named mine after the first song I was listening to when I built it, because that’s the kind of person I am), and make sure you check Camera Calibration along with whichever Basic adjustments you made.
Save Preset dialog in Lightroom Develop module
Once the RAW looks close to the JPEG and you’re happy with the combination of profile and basic adjustments, save it as a Develop preset. Click the + icon in the Presets panel, name it something you’ll remember (I named mine after the first song I was listening to when I built it, because that’s the kind of person I am), and make sure you check Camera Calibration along with whichever Basic adjustments you made.
From this point forward, go to your import settings and assign this preset to apply automatically on every import. Every RAW file that comes off your card will now start from a place that already looks alive, and you’ll spend your editing time on creative decisions instead of chasing a baseline.
One Thing I’d Add From My Own Workflow
The profile you choose in Camera Calibration isn’t just a corrective tool — it’s a creative one. After building my “fix the flat import” preset, I started building secondary presets with different profiles as the foundation for different shooting contexts. My portrait sessions start on a softer profile; my landscape work starts on something punchier. It keeps me from applying a one-size-fits-all look to work that deserves more nuance, and it’s all built on the same logic Matt demonstrates here.
If you shoot with multiple camera bodies, do this exercise for each one separately. The profiles are manufacturer-specific, and a Sony profile won’t behave the same way on a Canon file. Take the twenty minutes per body upfront and you’ll save yourself hours across a year of shooting.
The single most important idea here: the flat RAW isn’t a flaw in your exposure or your camera. It’s Lightroom doing exactly what it’s supposed to do, showing you unprocessed data. The camera profile system already has the tools to get you back to where you started on the LCD, and once it’s saved as a preset, you never have to think about it again.
Watch the full tutorial on YouTube to see Matt walk through the Reference View comparison in real time — seeing the side-by-side makes the profile differences much easier to judge than reading about them.
Comments
Leave a Comment